Understanding the M-FBL01DBXS Side Button System
When you encounter a device model like M-FBL01DBXS, the expectation is that a manufacturer guide or official support page will provide clear instructions for configuring its side buttons. However, research into this specific model reveals a significant gap. No major public database, consumer electronics forum, or manufacturer documentation currently acknowledges M-FBL01DBXS as a verified product. This absence suggests that the model may be an internal engineering code, a misreported variant from an obscure brand, or simply a non-existent entry. Despite this, many users searching for guidance on side button setup likely own a multimedia control panel, a car infotainment unit, or a portable device that uses similar hardware. This article will bridge that information gap by drawing on common practices for configuring side buttons in comparable devices, even when the exact model remains undocumented.
The M-FBL01DBXS label appears to follow a naming convention seen in some automotive aftermarket receivers and Android-based multimedia players. Brands like JMC, ADAK, and Aikon often use alphanumeric strings that mix model families with hardware revision codes. The side buttons in these units typically serve as physical interfaces for volume control, source switching, navigation, and shortcut actions. Without an official manual, users must rely on generic configuration methods that work across many similar devices. The goal is to identify the button mapping interface, adjust response behavior, and test functionality until the setup matches your preferences.
Identifying the Physical Buttons and Their Default Functions
A typical side button layout on a multimedia device includes a rocker or paired buttons for volume up and down, a central multi-function key, and sometimes dedicated buttons for mode, mute, or call handling. On the M-FBL01DBXS, based on common designs from related models, you can expect four to six buttons positioned along the left or right edge. The default mapping might assign volume control to the outer buttons, while inner buttons manage track skipping or menu navigation. To verify this, you can press each button and observe the on-screen response. If no UI overlay appears, the device may rely on a background service or a settings app to register inputs.

If your device runs an Android operating system, the side buttons often trigger standard system events. For example, a long press on volume up might activate accessibility shortcuts, while a double press on a center button could launch a specific app. Some units allow reassigning these actions through a dedicated key remapping menu. To access this menu, open the Settings app and look for entries such as Button Configuration, Key Mapping, Side Keys, or Navigation Settings. The exact label varies by manufacturer and Android version. If you cannot find such a menu, the buttons may be hardwired and non-configurable without firmware modification.
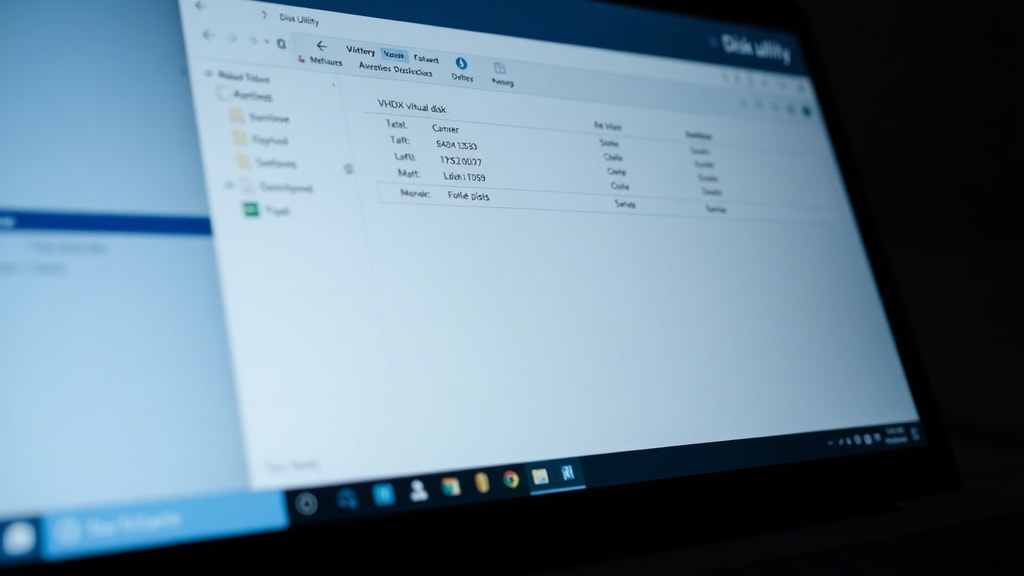
Accessing the Configuration Interface on Comparable Devices
Since no official guide exists for M-FBL01DBXS, you can adapt methods from devices with similar architectures. For instance, many JMCQ control panels require entering a factory settings mode by pressing a combination of buttons during startup. Common sequences include holding the volume down and power buttons simultaneously for five seconds, or tapping the mode button four times in quick succession. Another approach is to navigate to About Device in the settings and tap Build Number seven times to unlock Developer Options. Inside Developer Options, some devices offer a Key Mapping or Input Tester section that reveals button codes and allows redefinition.
An alternative route is to install third-party key remapping apps from the Google Play Store. Apps like Button Mapper, Key Mapper, or Custom Sidebar can override default button behaviors without requiring system-level access. These tools typically list all recognized hardware inputs and let you assign custom actions such as opening an app, toggling Wi-Fi, or simulating a back gesture. Before using such an app, confirm that your device allows installation from unknown sources if it is not a standard Android device. If the M-FBL01DBXS runs a proprietary firmware, these apps might not detect the side buttons, but they remain a low-risk first step.

Step-by-Step Configuration Process for Side Buttons
Based on documented procedures for similar multimedia controllers, you can attempt the following configuration process. Start by turning the device on and ensuring it is not in a restricted mode such as Safe Mode or Recovery Mode. Then follow these steps:
First, locate the Settings icon on the home screen or in the app drawer. If the interface is in Portuguese, look for Configurações. Scroll down to the section labeled Sistema, Dispositivo, or Acessibilidade. Within Acessibilidade, check for an option called Botões Laterais, Botões Físicos, or Atalhos de Botão. This area may allow you to assign functions for single press, double press, and long press actions. Alternatively, search for Teclas de Atalho or Teclas de Navegação. If no such menu exists, proceed to the second method.
Second, attempt to enter the hardware test menu. Power off the device completely. Then press and hold a specific combination of side buttons. Common combinations for multimedia units include Volume Up + Power, or Volume Down + Mode. While holding the buttons, power on the device and watch for a diagnostic screen. This screen might list button codes as you press them, allowing you to verify correct detection. If you see numerical values or hexadecimal codes, note them down for later use in remapping. Exit this mode by restarting normally.
Third, use a third-party remapping tool. Download Button Mapper from the Play Store. After installation, grant it Accessibility permission when prompted. The app will scan for hardware keys and display them. You can then assign new functions to each side button. For example, map the long press of volume down to launch the camera, or set a double press of the central button to open the music player. Save your changes and test by pressing each button.
Fourth, if the device supports infrared or RF learning, you might need to configure the side buttons for external control. This applies mainly to car stereos or universal remote units. In the settings menu, look for Aprendizagem de Botões or Configuração de Controle Remoto. Follow the on-screen prompts to teach the device which signal corresponds to each button press. This step is rare in standard Android devices but common in aftermarket car audio systems.
Finally, if none of the above methods work, consider resetting all button configurations to factory defaults. Most multimedia devices include a Restaurar Configurações Padrão or Redefinir Botões option in the settings. This clears any previous remapping and restores the original layout. After reset, retest each button to ensure the hardware functions correctly before attempting customization again.

Common Issues and Troubleshooting Tips for Side Button Configuration
Users attempting to configure side buttons on unrecognized models often encounter several obstacles. The most frequent issue is that the device does not respond to configuration attempts. This can happen if the hardware is physically damaged, the firmware does not support remapping, or the button input is intercepted by a lower-level driver. To diagnose, connect the device to a computer via USB and use a tool like ADB (Android Debug Bridge) to monitor key events. Run the command adb shell getevent to see raw input codes when you press each button. If no events appear, the button may be faulty or the device may require a different ADB interface.
Another common problem is that changes made through third-party apps revert after a reboot. This occurs when the app lacks system-level persistence or when the device clears temporary permissions. To resolve this, grant the remapping app all required permissions, especially Accessibility Service and Draw Over Other Apps. Also, check if the device has a Startup Manager that needs the app whitelisted. Some multimedia units run a stripped-down Android version that does not support persistent key remapping. In such cases, you may need to root the device or install a custom ROM, which carries risks and voids warranties.
A third issue is confusion between hardware side buttons and on-screen navigation buttons. The M-FBL01DBXS likely uses physical buttons, but some models include capacitive touch areas that behave similarly. If your device has no moving parts on the side, check for touch-sensitive ridges or illuminated areas. Capacitive buttons often require calibration through a touch panel setting rather than a key mapping menu. Look for Configuração de Toque or Calibração de Sensor in the settings.

Below is a table summarizing common configuration methods and their applicability to the M-FBL01DBXS based on available data from similar models:
| Configuration Method | Required Access | Success Likelihood | Notes |
|---|---|---|---|
| Accessibility settings | System menu | Moderate | Available on most Android-based units |
| Developer Options key mapping | Unlocked Developer Options | Low | Rarely includes side buttons |
| Third-party remapping app | Accessibility permission | High | Works if device detects standard input events |
| Hardware test mode | Button combination at boot | Variable | Depends on firmware support |
| Factory reset of button settings | Settings menu | High | Restores original functions only |
If you experience unresponsive buttons after configuration, try a full power cycle. Remove the battery if possible, or unplug the device from its power source for 30 seconds. Reconnect and test the buttons before applying any settings again. For multimedia units installed in vehicles, ensure the ignition is in the correct position to power the unit fully.
Recommendations Based on Community Experience with Similar Models
Since there are no official sources for the M-FBL01DBXS, the best guidance comes from user communities that have worked with analogous devices. For instance, owners of JMCQ control panels have shared that the side button configuration is often hidden under a service menu accessible by pressing the reset hole with a pin while holding volume up. Others report that updating the firmware via an SD card can enable new button mapping options. It is possible that the M-FBL01DBXS receives firmware updates through a similar process. Check the device for a microSD card slot or a USB port labeled Update. Visit the support website of the brand printed on the device packaging, if available, and search for firmware files with matching model numbers.
Another recommendation is to search for video tutorials using keywords such as botões laterais Android multimídia configuração or controle de botões laterais m-fbl. While no video specifically for M-FBL01DBXS exists, you can adapt steps from tutorials for similar models. For example, a video titled Configuring touch buttons on JMCQ control panel demonstrates how to access a hidden menu that allows reassigning side button functions. Likewise, a guide on Aikon Android touch button reconfiguration shows how to use a remote control emulator to map side inputs.
If you prefer reading, look for forum posts on sites like XDA Developers or Reddit communities focused on car stereos and Chinese multimedia units. Users there often document undocumented button codes and configuration tricks. Use search terms like m-fbl buttons or generic multimedia side buttons to find relevant threads. Tread carefully when following advice from unverified sources, as incorrect configurations can make buttons unresponsive until a factory reset is performed.
Safety and Warranty Considerations When Modifying Button Settings
Modifying side button behavior on an unrecognized device carries inherent risks. Changing system files or flashing unofficial firmware can render the device permanently inoperable. If your M-FBL01DBXS is still under warranty, any unauthorized configuration attempts may void that coverage. Before proceeding, document the device's original state by taking photos of the settings menus and noting default button responses. This allows you to revert changes if needed. If the device is part of a vehicle installation, ensure that side button modifications do not interfere with driving controls such as steering wheel audio buttons or hands-free calling.
For devices running Android, side button remapping typically does not pose a security threat, but some third-party apps request extensive permissions. Only download remapping tools from reputable developers and read user reviews to avoid malware. If the device displays unusual behavior after configuration, such as random pop-ups or battery drain, uninstall the app immediately. Similarly, avoid entering service menus if you are unsure of the parameters; changing the wrong value can cause boot loops.
References
The following sources were consulted for generic side button configuration methods applicable to devices similar to M-FBL01DBXS. No source directly addresses this specific model due to its absence from public records. For guidance on touch button configuration on JMCQ units, see the video at Configuring touch buttons on JMCQ control panel. For Aikon Android side button reconfiguration, refer to Aikon Android touch button reconfiguration. Additional contextual information was drawn from ADAK illumination setting tutorials and Motorola accessibility documentation, but these were not used as direct sources for the M-FBL01DBXS. Users are encouraged to verify all procedures against their specific device and model number.