Introduction
Configuring the default audio device in Windows is a fundamental task for anyone who uses multiple sound output or input peripherals. Whether you switch between speakers, headphones, a USB headset, or a Bluetooth speaker, Windows needs to know which device to use for system sounds, music, calls, and applications. Without setting the correct default device, you might hear audio from the wrong output or experience no sound at all. Fortunately, Windows offers several ways to manage this setting, from the modern Settings app to the classic Control Panel, and even through command line tools for advanced users. This article will guide you through each method, explain how to handle separate devices for communications, and provide troubleshooting tips if your audio device does not appear or work as expected. By the end, you will be able to control your audio output with confidence and precision.
Audio device management is especially important in work environments where you might use a headset for meetings while keeping desktop speakers for music or notifications. In gaming setups, many users prefer a high‑definition headset for chat and a separate audio interface for game sounds. Windows allows you to set default devices for both general playback and communications separately. Understanding these options helps avoid confusion and ensures that your audio always routes to the correct hardware. The following sections will cover the most common and reliable methods to set your default audio device, including step‑by‑step instructions, a comparison table, and a checklist of common pitfalls. Let us start with the easiest and most recommended approach.
Changing the Default Audio Device Using Windows Settings
The modern Windows Settings interface provides the fastest way to change your default audio device. This method works in both Windows 10 and Windows 11, though the exact layout may vary slightly between versions. To begin, press the Windows + I keyboard shortcut to open the Settings app. Then navigate to System and select Sound from the left‑hand menu. In the Sound settings page, look for the Output section. Here you will see a drop‑down list of all available audio output devices currently connected to your computer. Simply click on the device you want to use, and Windows will automatically set it as the default for all audio playback.
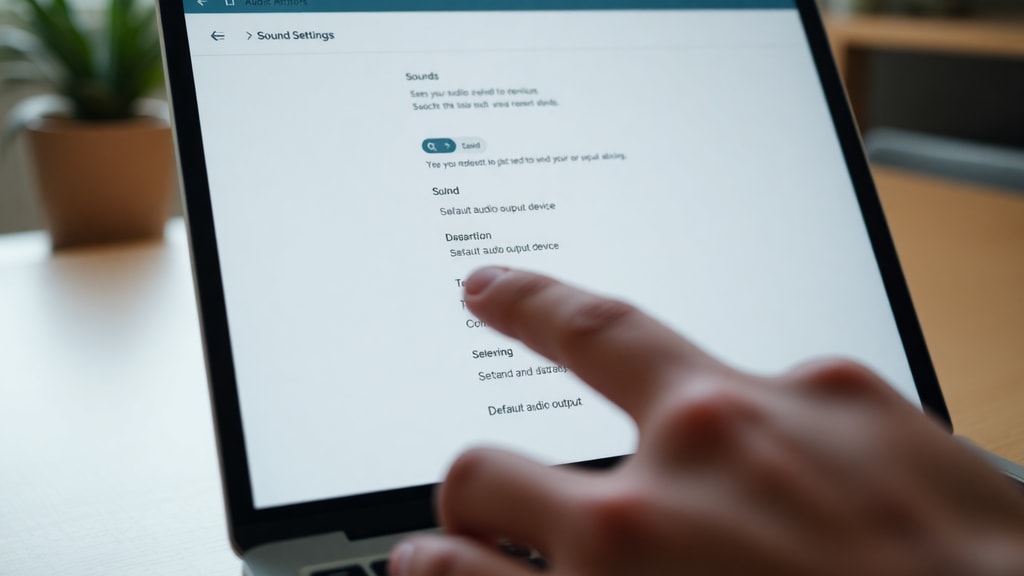
This method is straightforward and requires no complex steps. However, be aware that if you have multiple applications running, some may still use a previously selected device until you restart them. The Settings app also gives you a quick way to test a device. Under the same Output section, click the Test button next to the device name. Windows will play a short tone through that device, allowing you to verify that it is working and that you have chosen the correct output. If you do not see an expected device, ensure it is properly connected and powered on. Windows automatically adds new devices to this list when they are detected, but sometimes you may need to click Add device under the Input or Output section to pair a Bluetooth speaker or headset.
Another advantage of this method is that you can also adjust device properties directly. For example, you can change the volume balance between left and right channels, enable spatial audio formats like Windows Sonic for Headphones, or set the device as the default for communications only. To access these options, click on the device name in the output list, then scroll down to the More sound settings link, which opens the classic Control Panel sound window. For most users, the Settings method is sufficient and provides a clean, modern interface. Remember to close Settings after making your change. Your new default will persist until you manually switch it again or disconnect the device. The official Microsoft support page offers additional guidance for troubleshooting sound issues that may arise after changing defaults.
Using the Control Panel as an Alternative Method
For users who prefer the traditional Windows interface or need more granular control, the Control Panel remains a powerful tool for managing audio devices. The Control Panel method is especially useful if you cannot find a specific device in the Settings app or if you need to set a device as the default for both playback and recording simultaneously. To open the sound control panel directly, press Windows + R to launch the Run dialog, then type the following command: rundll32.exe shell32.dll,Control_RunDLL mmsys.cpl,,0. Press Enter, and the classic Sound window will appear. Alternatively, you can navigate through Control Panel by selecting Hardware and Sound and then clicking Sound.
In the Sound window, click the Playback tab to see a list of all output devices. Each device is shown with its name, icon, and status (such as Ready or Not plugged in). Right‑click the device you want to set as the default, and choose Set as Default Device from the context menu. A green checkmark will appear next to the device, indicating that it is now the primary playback device. You can also set a device as the default for communications only by right‑clicking and selecting Set as Default Communication Device. This option is extremely handy if you want to use your headset for calls while keeping your speakers for all other audio. To confirm your selection, click Apply and then OK. The change takes effect immediately for most applications.
The Control Panel also allows you to configure device properties in depth. Right‑click a device and select Properties to adjust advanced settings such as sample rate, bit depth, exclusive mode, and enhancements. For example, you can disable audio enhancements if they cause crackling or echo. You can also enable or disable the device entirely. If you cannot see a device listed, right‑click anywhere in the white space of the Playback tab and check Show Disabled Devices and Show Disconnected Devices. This reveals hidden or disconnected hardware. Once you set your preferred default, you can close the window. The Control Panel method is reliable and works identically on Windows 10 and Windows 11, making it a steadfast alternative for audio management.
Using PowerShell and Nircmd for Advanced Control
For advanced users or system administrators who need to automate the process of setting a default audio device, command‑line tools like PowerShell and the third‑party utility Nircmd offer powerful capabilities. This method is especially useful when you need to switch devices frequently, create scripts for different scenarios (like plugging in headphones), or manage audio on remote computers. The first step is to download Nircmd from the NirSoft website. After downloading, extract the contents to a folder on your system, such as C:\Nircmd. Ensure that the folder is added to your system PATH or that you run the commands from that directory. Nircmd is a lightweight command‑line tool that can perform many system tasks, including audio device management.
Open PowerShell as Administrator by right‑clicking the Start button and selecting Windows PowerShell (Admin) or Terminal (Admin). To set a default audio device using Nircmd, you need to know the exact name of the device as it appears in the Sound settings. For example, if your speakers are listed as Speakers (Realtek High Definition Audio), you would run the following command: nircmd.exe setdefaultsounddevice "Speakers (Realtek High Definition Audio)". Press Enter, and the command will execute silently. If you want to set the device as the default for communications only, use the command: nircmd.exe setdefaultsounddevice "Headset (Your Headset Name)" 1. The number 1 represents communications; 0 is for all audio. You can test the change by playing any sound. Nircmd is a reliable tool, but keep in mind that device names must be typed exactly as shown, including any parentheses or punctuation.
Another option is to use native PowerShell commands without third‑party tools, though this requires more scripting. The Get‑AudioDevice cmdlet is available in newer versions of PowerShell for Windows 11 and some builds of Windows 10. You can list all devices with Get‑AudioDevice and then set the default with Set‑AudioDevice –ID "DeviceID". However, because this cmdlet is not installed by default on all systems, many users prefer Nircmd for its simplicity and consistent behavior. If you automate the process, you can create a batch script that runs the appropriate Nircmd command whenever a specific USB device is connected, using tools like Event Viewer or Task Scheduler. This is a powerful way to ensure your audio always routes to the right hardware without manual intervention. Remember to run the PowerShell as an administrator to avoid permission errors. The Procedimento website provides additional examples for using PowerShell to configure default audio devices.
Setting a Separate Default Device for Communications
Many users do not realize that Windows allows you to have a different default audio device for communication applications such as Microsoft Teams, Zoom, Skype, or Discord. This feature is incredibly useful if you want to use a headset for voice calls while keeping your desktop speakers for music, games, or system sounds. When you set a device as the default for communications, applications that specifically request the communications device will use it, while all other audio still plays through the main default device. To configure this, go to Settings > System > Sound. Under the Output section, click on the device that you want to use for calls. Then scroll down to the Set as default for communications toggle and turn it on. Alternatively, you can use the Control Panel method described earlier: right‑click the device in the Playback tab and choose Set as Default Communication Device.

It is important to understand the difference between the two defaults. The main default device routes all audio unless an application explicitly chooses the communications device. Many modern communication apps respect this settings and will automatically use the communications default. However, some applications have their own audio settings inside their preferences. Always check the audio settings within your communication software to ensure they are set to either the system default communications device or the specific device you want. For example, in Microsoft Teams, go to Settings > Devices and select the appropriate speaker and microphone. Setting the communications default in Windows ensures that even if an app does not have its own device selector, it will follow this preference. This feature also applies to some games that use voice chat, and it can reduce confusion when you quickly need to switch between speakers and a headset for a call.
If you do not see the communications option for a particular device, it may be because the device is not designed for voice communications, or the driver does not support it. In most cases, any device that has a microphone or is listed as a headset will offer this choice. You can also set a different device for input (microphone) separately. In the Input section of Settings, you can select a default input device and also set a default for communications input. This ensures that your microphone for calls is always the correct one, even if you have multiple microphones connected. For a complete audio configuration, check both output and input communications settings. The Acer Community article on selecting audio devices provides further clarity on how to separate audio for communications.
Quick Access from the Taskbar
Windows 10 and Windows 11 both offer a very convenient shortcut to change the default audio device directly from the taskbar, without opening any settings windows. This method is perfect for quick switches, such as when you need to put on a headset for a sudden meeting. Simply click the speaker icon in the system tray (near the clock) to open the volume flyout. In Windows 11, you will see a small arrow above the volume slider. Click that arrow to reveal the list of available audio output devices. Then select the device you want to use. In Windows 10, after clicking the speaker icon, you may see a menu that says Select a device for playback or a dropdown list at the top of the flyout. Clicking a device immediately sets it as the default for audio output. This change is temporary and will remain in effect until you switch again or disconnect the device. Note that some third‑party audio managers may override this setting, but for standard Windows behavior, it works reliably.
One limitation of this method is that it only sets the device as the general default; it does not allow you to set a separate communications default from the same menu. If you need to adjust communications settings, you will need to use the Settings or Control Panel methods. Additionally, the taskbar menu shows only devices that are currently enabled and connected. If you have a Bluetooth device that is paired but not currently active, it may not appear in the flyout. You would need to connect it first via the Bluetooth settings. Despite these minor constraints, the taskbar approach is the fastest way to redirect audio in everyday scenarios. Many users rely on this shortcut because it takes only a couple of clicks and does not interrupt your workflow. To further streamline the process, you can pin the Sound settings to your taskbar for quicker access to more detailed controls. However, for the vast majority of cases, clicking the speaker icon and selecting the desired device is all you need to do.
Troubleshooting Common Audio Device Issues
Even after setting the default audio device, you may sometimes experience problems such as no sound, a device not appearing in the list, or audio still coming from the wrong source. These issues are common but usually fixable with a few steps. First, ensure that the device is properly connected and powered on. For USB or Bluetooth devices, try disconnecting and reconnecting them. If the device still does not show up in the sound settings, right‑click the speaker icon and select Sound settings. Then scroll down to Advanced sound options and click App volume and device preferences. Here you can see which device each application is using. Sometimes an app is manually set to a different device, overriding the system default. Change the output for that specific app to the desired device. Another common cause is driver issues. Update your audio drivers by going to Device Manager, expanding Sound, video and game controllers, right‑clicking your audio device, and selecting Update driver. You can also try rolling back a driver if the problem started after an update.
If you still have trouble, run the built‑in audio troubleshooter. Go to Settings > System > Troubleshoot > Other troubleshooters (Windows 11) or Update & Security > Troubleshoot (Windows 10) and run the Playing Audio troubleshooter. It will automatically detect and fix many common problems, such as disabled devices or incorrect defaults. Another useful tip is to check that the device is not disabled. In the Control Panel sound window, right‑click on an empty area and ensure Show Disabled Devices is checked. If you see a device that is greyed out, right‑click it and select Enable. Also, confirm that the volume is not muted or set too low, both in Windows and on the physical device. Finally, restart your computer. A simple reboot can resolve many audio glitches. For persistent issues, consult the Microsoft support article linked earlier, which provides comprehensive troubleshooting steps for audio problems in Windows.
Comparison of Methods for Setting Default Audio Device
To help you choose the best method for your situation, the table below summarizes the main approaches, their ease of use, the level of control they offer, and their suitability for different scenarios. Each method has its strengths, and you can combine them as needed.
| Method | Ease of Use | Control Level | Best For |
|---|---|---|---|
| Windows Settings | Very Easy | Basic to Moderate | Everyday users, quick changes |
| Control Panel | Easy | Advanced | Granular settings, device properties |