Why Your Microphone Might Be Disabled
Many laptop users encounter situations where their microphone suddenly stops working or appears to be missing from the system. This can happen for several reasons ranging from accidental keystrokes that mute the device to privacy settings that block applications from accessing the microphone. In some cases, outdated drivers or hardware conflicts can cause the microphone to become disabled without any obvious notification. Understanding these root causes is the first step toward a quick fix. The good news is that most microphone issues are simple to resolve and do not require advanced technical skills. Whether you use your laptop for video calls, voice commands, or recording, having a functional microphone is essential. This article will guide you through every reliable method to enable your laptop microphone easily, using built-in Windows tools and best practices.
Enabling the Microphone via Windows Settings
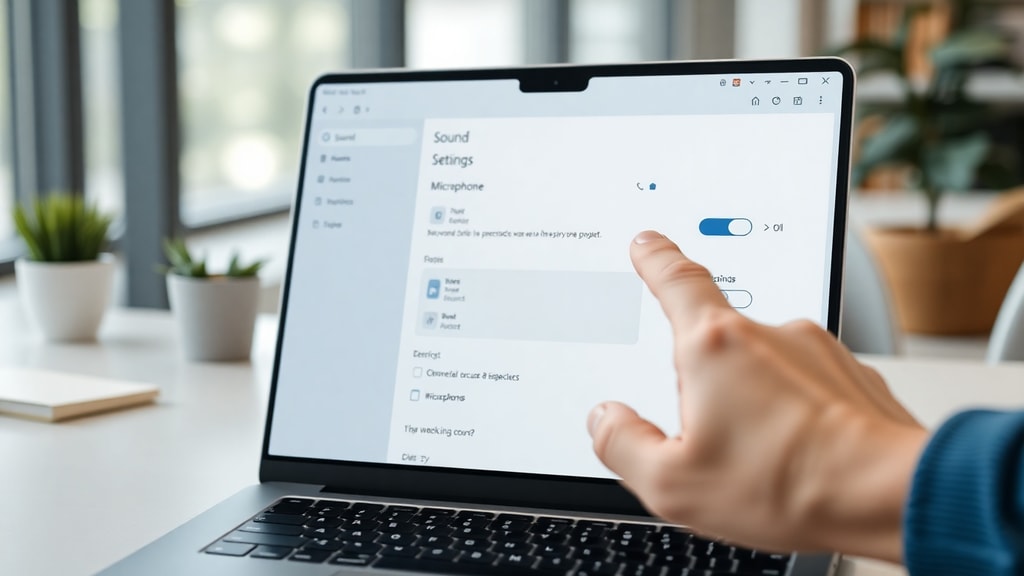
The most straightforward way to enable your laptop microphone on Windows 10 or Windows 11 is through the dedicated sound settings. Begin by opening the Settings app from the Start menu. Navigate to System and select Sound from the left sidebar. Scroll down to the Input section. Here you will see a dropdown menu that lists all available microphone devices. If your microphone appears in the list but is grayed out, it may be disabled. Click on Manage audio devices under the Input section. A new window will open showing all audio input devices. Locate your microphone, click on it, then select Enable. After enabling, the microphone should appear as active, and you can test it by speaking into it while watching the blue test bar move. If the bar responds, your microphone is now working. Remember that this method overrides any driver level or privacy block, but it is often the first step because it clearly shows the status of each input device.
Using the Classic Control Panel Method
For users who prefer the traditional interface, the Control Panel offers a reliable way to manage microphones. Open the Control Panel by searching for it in the Start menu. Click on Hardware and Sound, then select Sound. In the new window, switch to the Recording tab. Here you will see a list of all recording devices, including any internal or external microphones. Right click in the empty space of this list and ensure that Show Disabled Devices is checked. This will reveal any microphone that has been disabled at the system level. If you see your microphone listed with a down arrow icon, right click on it and select Enable. The device will now become active. You can also right click and choose Set as Default Device to make it the primary input. This method is especially useful when the Windows Settings interface does not show the microphone at all. The Recording tab in the Sound dialog provides detailed status information, including whether the device is disconnected or disabled.

Checking Privacy Permissions for Microphone Access
Modern Windows versions include robust privacy controls that can block microphone access for all applications or for specific ones. If your microphone is enabled in the sound settings but still does not work in certain apps, the problem is likely permission related. Go to Settings, then Privacy and security, and select Microphone from the left menu. Ensure that the toggle for Microphone access is turned On. Below this, you will see a list of applications that have requested microphone access. Make sure that the applications you want to use, such as Zoom, Teams, or voice recorder, have their individual toggles enabled. Some users accidentally disable these permissions during initial setup or while cleaning up privacy settings. Also check the option Allow apps to access your microphone. This permission must be granted at the system level before any individual app can use the hardware. Once these settings are correctly configured, restart the application and test the microphone again.
Updating or Reinstalling Audio Drivers
When the microphone remains unresponsive despite being enabled and permitted, the culprit is often a corrupt or outdated driver. Drivers act as the communication bridge between the operating system and the hardware. To update the driver, right click the Start button and select Device Manager. Expand the section labeled Audio inputs and outputs. You will see your microphone listed, often with a name like Internal Microphone or Realtek Audio. Right click on it and choose Update driver. Select Search automatically for drivers. Windows will search online for the latest driver version and install it if found. If Windows reports that the best driver is already installed, but the problem persists, you can try uninstalling the driver. Right click the microphone entry and select Uninstall device. Check the box that says Attempt to remove the driver for this device if available, then confirm. Restart your laptop. Windows will automatically reinstall the driver upon boot. This process clears any corrupted driver data and often resolves persistent microphone failures.
Quick Activation via the Sound Icon
For a rapid check, you can use the sound icon in the system tray. Right click the speaker icon near the clock and select Sound settings. This will open the same Sound settings page described earlier. Alternatively, you can left click the speaker icon and then click the arrow next to the volume slider to manage audio devices. This quick access path is helpful when you need to verify microphone status without navigating through multiple menus. In the Sound settings window, look for the Input section. If the microphone is disabled, a message may appear indicating that the device is not available. Click on Manage audio devices to see all input devices. From here, you can enable a disabled microphone with a single click. This method is particularly useful when you are in the middle of a meeting and need to restore microphone functionality immediately. It bypasses the privacy and driver update steps, focusing solely on the device activation state.
Troubleshooting Tips for Common Issues
Even after following the above methods, some users still face microphone problems. Below is a list of common issues and their solutions:
Check physical mute switches or keyboard shortcuts on your laptop. Many laptops have a function key combination, such as Fn plus F4 or a dedicated mute button, that disables the microphone.
Verify that your microphone is not physically blocked or covered by a privacy shutter or case. Some laptops include a physical microphone mute switch on the side or near the keyboard.

Run the built-in audio troubleshooter by going to Settings, then System, then Troubleshoot, and selecting Other troubleshooters. Run the Recording Audio troubleshooter and follow the instructions.
Disable audio enhancements for your microphone. In the Sound dialog under the Recording tab, right click your microphone, select Properties, go to the Enhancements tab, and check Disable all enhancements.
Ensure that your laptop is not in airplane mode or that Bluetooth is not interfering with the internal microphone. Sometimes Bluetooth headsets can take over audio input, causing the internal mic to be ignored.

If you use a docking station or external hub, disconnect it and test the microphone directly. Some hubs can cause conflicts with internal audio devices.
Now, here is a quick reference table summarizing the main activation methods:
| Method | Key Steps | When to Use |
|---|---|---|
| Windows Settings | Settings > System > Sound > Manage audio devices > Enable | When device is shown but disabled |
| Control Panel | Control Panel > Hardware and Sound > Sound > Recording > Enable | When Settings does not show device |
| Privacy Permissions | Settings > Privacy and security > Microphone > Enable access | When microphone works in system but not in apps |
| Driver Update | Device Manager > Audio inputs and outputs > Update or Uninstall | When microphone is not responding |
| System Tray | Right click speaker icon > Sound settings > Manage audio devices | For quick status check |
This table should help you identify which approach fits your specific situation. If the microphone still does not activate after trying all methods, consider testing it on another device to rule out hardware failure. Many laptop microphones are soldered onto the motherboard and cannot be replaced individually, so a hardware issue may require professional repair.
For a deeper understanding of how to configure and test microphones on Windows, Microsoft provides a dedicated support page that covers additional scenarios, including multiple microphone setups and accessibility features. You can read more at Microsoft Support: Configure and test microphones on Windows. Another reliable resource is a guide from TechTudo that explains classic Control Panel methods for enabling microphones on notebooks, which you can access at TechTudo: How to activate the notebook microphone with Windows.
References
Microsoft Support. How to set up and test microphones on Windows. Accessed from https://support.microsoft.com/pt-br/windows/como-configurar-e-testar-microfones-no-windows-ba9a4aab-35d1-12ee-5835-cccac7ee87a4
TechTudo. How to activate the notebook microphone with Windows. Accessed from https://www.techtudo.com.br/dicas-e-tutoriais/2021/07/como-ativar-o-microfone-do-notebook-com-windows.ghtml
HUAWEI Suporte. Enable and disable the computer microphone. Accessed from https://consumer.huawei.com/pt/support/content/pt-pt00835521/
Tecnoblog. How to enable or disable the notebook microphone. Accessed from https://tecnoblog.net/responde/como-ativar-ou-desativar-o-microfone-do-notebook/