How to Enable Dictation on Any Device
Dictation technology has transformed how we interact with our devices, allowing hands-free typing, faster note-taking, and improved accessibility. Whether you are drafting a document, composing a message, or simply exploring voice control, knowing how to enable dictation can save time and reduce physical strain. This article provides a complete, step-by-step guide for enabling dictation on Windows, macOS, iOS, Android, and within popular applications like Microsoft Word and Google Docs. Each section includes clear instructions, keyboard shortcuts, and practical tips to ensure a smooth setup.
What Is Dictation and Why Use It?
Dictation converts spoken words into written text using speech recognition technology. Modern dictation tools are highly accurate, supporting multiple languages, punctuation commands, and real-time editing. Benefits include increased typing speed, reduced risk of repetitive strain injuries, and easier multitasking. For individuals with disabilities, dictation can be an essential accessibility feature. Most operating systems and productivity apps now include built-in dictation, requiring only a microphone and a few settings adjustments.
Enabling Dictation on Windows 10 and Windows 11
Windows 10 and 11 include a built-in voice typing tool that works across most text fields. To start dictation, press the Windows key and H simultaneously. A small voice typing bar appears at the top of the screen with a microphone icon. Click the microphone icon or say "start listening." Speak clearly, and your words will appear in the active text box. You can say punctuation like "comma," "period," or "new line" to format your text. To stop dictation, click the microphone icon again or press Windows + H once more. For best results, ensure your microphone is enabled and positioned correctly. Windows voice typing supports multiple languages, which can be changed in Settings > Time & Language > Speech.
Enabling Dictation on Mac (macOS)
On a Mac, dictation is a system-wide feature accessible from the keyboard settings. Open the Apple menu and select System Settings. Click Keyboard in the sidebar, then scroll to Dictation on the right. Toggle the switch to On. A prompt may appear asking you to confirm activation. Click Activate if prompted. Once enabled, you can start dictation by pressing the Fn (Function) key twice, or by selecting Edit > Start Dictation from the menu bar. Some Mac models also support pressing the F5 key, which often has a microphone icon. To improve accuracy, consider downloading enhanced dictation for offline use. This option is available in the same Dictation settings. Speak naturally, and say "period," "comma," or "question mark" to add punctuation.
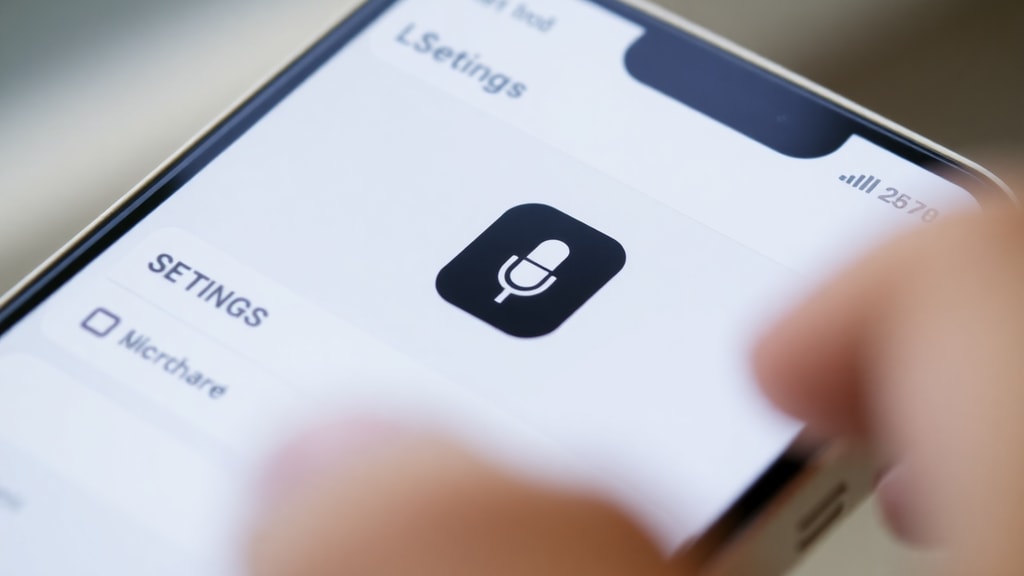
Enabling Dictation on iPhone and iPad
Apple devices with iOS offer dictation as part of the on-screen keyboard. Open Settings, tap General, then tap Keyboard. Find the toggle for Enable Dictation and turn it on. A confirmation message may appear; tap Enable Dictation to confirm. After activation, a microphone key appears on the keyboard, usually near the space bar or the globe icon. Tap the microphone icon to start dictating. Speak clearly, and your words appear in any text field. Tap the microphone again to stop. Dictation works in Messages, Notes, Mail, and most third-party apps. You can also dictate punctuation and formatting commands. For optimal performance, ensure your internet connection is stable, as iOS dictation processes speech on Apple servers by default.
Enabling Dictation on Android Devices
Android uses Google Voice Typing for dictation, which is often enabled by default. To verify or activate it, go to Settings. Navigate to System (or Additional Settings on some brands like Xiaomi), then Languages & Input, then Manage Keyboards. Ensure Google Voice Typing is toggled on. If you see a list of keyboards, make sure Google Voice Typing appears and is enabled. To use dictation, open any app where you can type, tap a text field, and the keyboard appears. Look for the microphone icon on the keyboard (usually near the space bar or on the top row). Tap the microphone icon and start speaking. Your words will be transcribed in real time. You can say "period," "comma," or "question mark" for punctuation. To stop, tap the microphone again. Google Voice Typing works offline after downloading the offline speech package.

Enabling Dictation in Microsoft Word
Microsoft Word includes a dedicated dictate button for Windows and Mac. Open a blank or existing document. Click the Home tab at the top of the window. Look for the Dictate button, which has a microphone icon. Click it. If prompted, grant microphone permissions. The button will turn blue, and a small panel may appear. Start speaking clearly. To insert punctuation, say "period," "comma," or "new paragraph." To stop dictation, click the microphone icon again or say "stop dictation." On Windows, you can also press the dictation shortcut, but the button is more reliable. Dictate supports multiple languages, selectable by clicking the gear icon near the Dictate button. Note that a Microsoft 365 subscription may be required for some advanced dictation features on Mac.
Enabling Dictation in Google Docs
Google Docs offers voice typing as a built-in tool within its web interface. Open a Google Docs document in your browser. From the menu bar, click Tools. Select Voice typing. A microphone icon appears in a floating box on the left side of the document. Click the microphone to enable it. The first time you use it, your browser may ask for microphone permission; allow it. The icon will turn red, indicating it is listening. Speak clearly. Your words will appear in the document at the cursor location. You can say "select all," "copy," or "delete" for editing, plus punctuation like "comma" and "period." To stop, click the microphone again. Google Docs voice typing works best in Google Chrome. It supports over 100 languages and dialects, changeable from the dropdown menu above the microphone icon.
Comparison Table of Dictation Methods
| Device/Application | Activation Method | Microphone Access | Offline Support |
|---|---|---|---|
| Windows 10/11 | Windows + H key | System permission | Yes (with language pack) |
| Mac (macOS) | Fn key twice (or F5) | System permission | Yes (enhanced dictation) |
| iPhone/iPad | Keyboard microphone icon | In-app permission | No (requires internet) |
| Android | Keyboard microphone icon | In-app permission | Yes (language pack) |
| Microsoft Word (Win/Mac) | Home tab > Dictate button | App permission | No (internet required for some) |
| Google Docs (Web) | Tools > Voice typing | Browser permission | No (requires internet) |
Common Dictation Shortcuts and Tips
To make dictation faster and more efficient, learn the common voice commands and keyboard shortcuts. Here is a list of essential tips for all platforms:

- Say "period," "comma," "question mark," or "exclamation point" to add punctuation.
- Say "new line" to start a new line without a paragraph break.
- Say "new paragraph" to create a paragraph break.
- After activating dictation, keep your internet connection stable for cloud-based services.
- Use a dedicated microphone or headset for better accuracy in noisy environments.
- Train your device with your voice if the option is available, such as in Windows speech settings.
- Pause briefly between sentences to allow the system to process your speech.
- For Mac, press Fn twice quickly, not once, to avoid accidental activation.
- On Windows, you can use the "show help panel" command if you forget a command.
- Test your microphone in the device settings before starting an important dictation session.
Troubleshooting Common Dictation Issues
If dictation does not start or stops working, check these common causes. First, ensure your microphone is connected and not muted. On Windows, go to Settings > System > Sound and check your input device. On Mac, verify microphone permissions in System Settings > Privacy & Security > Microphone. For iPhone and Android, restart the keyboard or toggle dictation off and on in settings. In Microsoft Word and Google Docs, refresh the page or restart the app. Another frequent issue is background noise; move to a quieter space or use a headset. If your language is not supported, change the dictation language to English or another available option. Finally, update your operating system or application to the latest version, as dictation features improve with updates.
Advanced Dictation Features and Accessibility
Many devices offer advanced dictation options beyond basic text input. On Windows, you can use voice typing to navigate the system, open apps, or send emails. Mac supports dictation commands for selecting, deleting, and formatting text. iOS and Android allow dictation in any app that uses the standard keyboard. For accessibility, dictation can be combined with screen readers or switch controls. For instance, a user with limited mobility can dictate text and use voice commands to control the cursor. Microsoft Word's Dictate includes auto-punctuation and smart formatting, such as inserting dates and times by saying them. Google Docs voice typing supports editing commands like "select next word" or "delete that." Explore the settings of each platform to customize the dictation experience to your needs.
Security and Privacy Considerations
When using dictation, be aware that your speech is often processed on remote servers. Windows voice typing sends data to Microsoft servers for processing, though you can disable online speech recognition in Privacy Settings. Mac enhanced dictation can be used offline to keep your data local. iOS and Android default to cloud processing, but you can download offline language packs on Android. Google Docs voice typing always requires an internet connection and sends speech to Google servers. For sensitive information, consider using offline dictation options or third-party software with local processing. Always review the privacy policies of the tools you use. Most platforms allow you to delete voice recordings from your account settings.

Recommended Third-Party Dictation Tools
While built-in dictation is sufficient for many users, third-party tools offer additional features like custom commands, transcription services, and higher accuracy. Popular options include Dragon NaturallySpeaking for Windows and Mac, which supports advanced voice control. Otter.ai is excellent for transcribing meetings and lectures. Speechnotes and Dictation.io provide web-based solutions that work in any browser. For mobile, Gboard and SwiftKey offer enhanced dictation with multilingual support. Some tools require a subscription, but many have free tiers with limited features. Third-party tools often support industry-specific vocabulary, which can be useful for medical or legal professionals.
References
Transkriptor. "Windows Voice Typing: How to Enable and Use Dictation." Transkriptor Blog, accessed October 2023. https://transkriptor.com/pt-pt/ditado/
Apple Support. "Dictate on Mac." Apple Support Guide, accessed October 2023. https://support.apple.com/pt-br/guide/mac-help/mh40584/mac

Apple Support. "Dictate on iPhone." Apple Support Guide, accessed October 2023. https://support.apple.com/pt-br/guide/iphone/iph2c0651d2/ios
Microsoft Support. "Dictate your documents in Word." Microsoft Support Article, accessed October 2023. https://support.microsoft.com/pt-pt/word/dictate-your-documents-in-word
Transkriptor. "Android Voice Typing: Setup and Use." Transkriptor Blog, accessed October 2023. https://transkriptor.com/pt-pt/ditado/
YouTube Tutorial. "Dictation on Mac Tutorial." YouTube, accessed October 2023. https://www.youtube.com/watch?v=D3QJ3AZZn5U