Introduction to Changing the Date on Windows 11
Changing the date on your Windows 11 computer is a straightforward task that can be necessary for various reasons, such as correcting an incorrect date after a time zone change, troubleshooting software that relies on accurate timestamps, or simply adjusting the system clock for personal preference. While Windows 11 normally synchronizes the date and time automatically via the internet, there are times when manual adjustment is required. Whether you are using a laptop, desktop, or tablet running Windows 11, the process is consistent and user-friendly. This guide will walk you through the exact steps to change the date, highlight important settings, and provide tips for avoiding common pitfalls.
The date and time settings in Windows 11 are located within the Settings app, which has been redesigned for clarity and ease of navigation. By following the instructions below, you will learn how to disable automatic time synchronization, manually set a new date, and verify that your changes are applied correctly. Additionally, we will cover alternative methods, such as using the Control Panel or Command Line, for users who prefer different approaches.
Why You Might Need to Change the Date Manually
Windows 11 is designed to keep the system clock accurate by default, using time servers on the internet. However, there are scenarios where manual intervention becomes necessary. For example, if your computer is not connected to the internet for an extended period, the automatic time setting may drift. In other cases, you might need to test software that behaves differently on specific dates, or you may have changed the system time zone and need to align the date accordingly. Some users also find that their motherboard battery is failing, causing the date to reset after each shutdown. Understanding these contexts helps you decide when manual adjustment is the right solution.
Another common reason is when you are running a legacy application that requires a particular date format or when you want to hide your actual location for privacy reasons. While changing the date does not affect your IP address, it can impact time-stamped files and logs. Always remember that manually setting an incorrect date can cause issues with certificate validation, online authentication, and scheduled tasks, so use this feature with caution.
Step-by-Step Guide: How to Change the Date Using Settings
The primary method for changing the date on Windows 11 is through the Settings app. Follow these steps carefully:
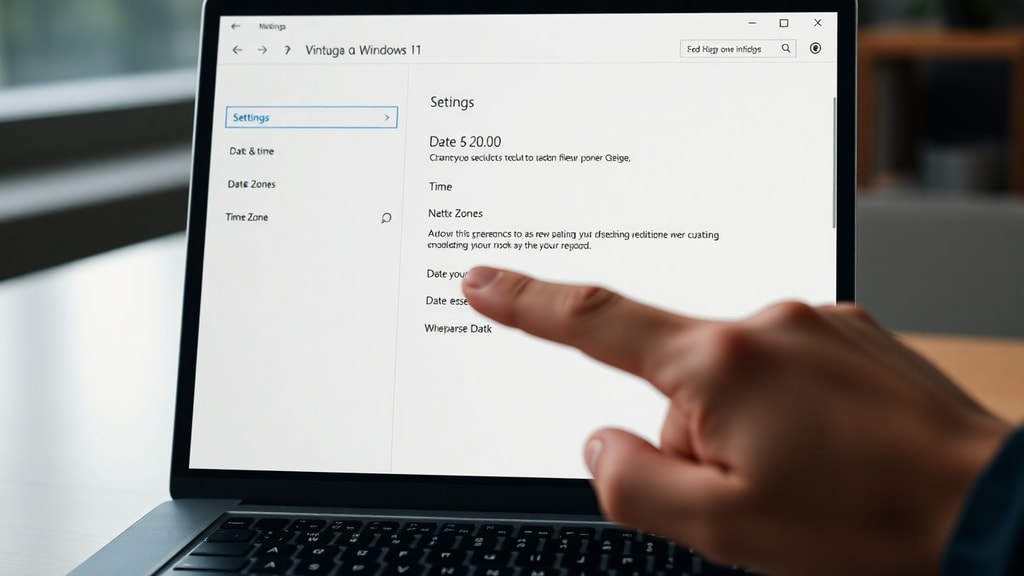
First, open Settings by pressing the Windows key and the I key simultaneously. Alternatively, you can click the Start button and then select the gear icon labeled Settings. This opens the main Settings window. In the left sidebar, locate and click on the category called Time & language. Within that section, you will see the Date & time option on the right side of the window. Click on it to access the date and time settings.
On the Date & time screen, the first thing you will notice is the toggle switch labeled Set time automatically. By default, this is turned on. To enable manual date editing, you must turn this switch off. A confirmation prompt may appear asking if you want to disable automatic time; click Yes. Once automatic time is disabled, a new section appears below called Set the date and time manually. Click the Change button inside this section.
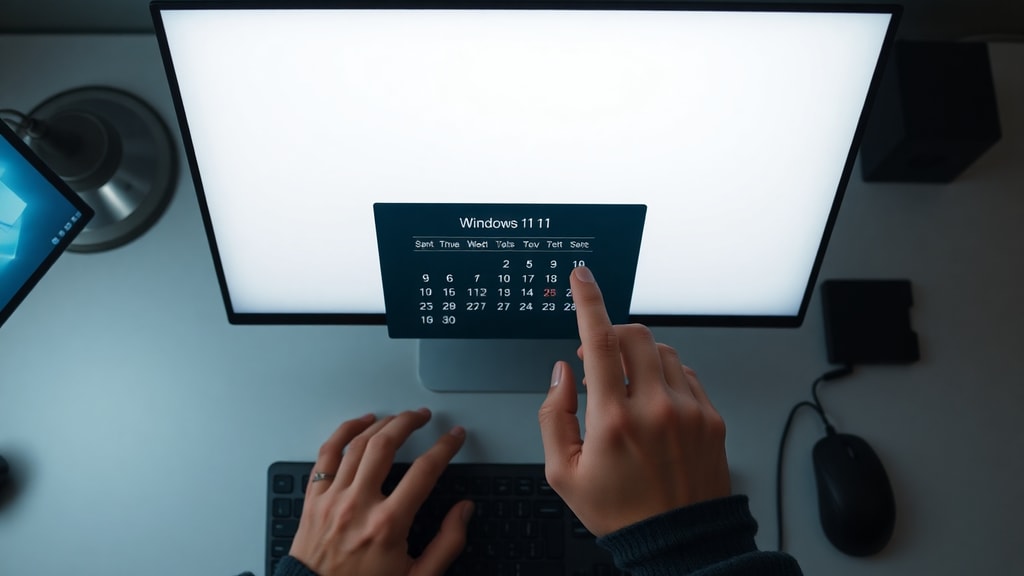
A small pop-up window will appear titled Change date and time. Here, you can adjust the day, month, and year using dropdown menus. The day dropdown lists numeric days from 1 to 31, the month dropdown shows month names and numbers, and the year dropdown covers a wide range. After selecting your desired date, click the Change button at the bottom of the pop-up to apply the changes. The new date will immediately take effect on your system clock.
If you ever need to revert to automatic time, simply go back to the same settings and turn the Set time automatically toggle back on. Windows will then sync with the internet time server and override any manual setting.
Alternative Method: Using the Control Panel
Some users prefer the classic Control Panel interface for system settings. To change the date via Control Panel, press the Windows key, type Control Panel, and open the app. In Control Panel, change the view to Large icons or Small icons, then click on Date and Time. This opens a window with three tabs. On the Date and Time tab, click the Change date and time button. A calendar and clock interface appears, allowing you to select a new date by clicking on the calendar grid and adjusting the time portion if needed. Click OK to save. Note that if automatic time sync is enabled, your manual change may be overwritten the next time Windows checks for updates. Therefore, you should also disable automatic time in Settings if you plan to keep the manual date permanently.
This method is essentially the same as the Settings approach but presented in a different interface. For users accustomed to previous Windows versions, the Control Panel might feel more familiar.
Using Command Line to Set the Date
Advanced users or IT professionals may prefer to change the date using the Command Prompt. Open Command Prompt as an administrator by right-clicking the Start button and selecting Terminal (Admin) or Command Prompt (Admin). Type the command date and press Enter. The system will display the current date and ask you to enter a new date in the format MM-DD-YYYY. For example, to set the date to December 25, 2025, type 12-25-2025 and press Enter. The change takes effect immediately. Keep in mind that this method bypasses the graphical interface and may require disabling automatic time synchronization beforehand to prevent Windows from reverting the change.
Similarly, you can use PowerShell with the command Set-Date -Date "12/25/2025". Both command line tools are powerful but should be used with care, as incorrect input can set the date to a nonsensical value.
Important Considerations and Troubleshooting
When you change the date manually, several system behaviors may be affected. Windows Update relies on accurate timestamps to download and install updates. If the date is set far in the past or future, update checks may fail. Additionally, some websites and services use the system clock to verify SSL certificates, so an incorrect date can trigger security warnings. If you change the date for testing purposes, make sure to revert it to the correct value afterward.
If you find that the date keeps resetting after a reboot, it could indicate a failing CMOS battery on your motherboard. This battery powers the real-time clock when the computer is off. Replacing the battery is a simple hardware fix. Also, check that your time zone is correctly set, as an incorrect time zone can cause the date to appear wrong even if the UTC time is correct. In the Date & time settings, you can adjust the time zone manually or enable automatic time zone detection.
Another common issue is that after setting a manual date, the system might sync with an internet time server and overwrite your change. To prevent this, ensure that the Set time automatically toggle remains off. If you are on a corporate network, Group Policy may enforce automatic time synchronization, preventing manual changes. In that case, contact your IT administrator.

Table: Quick Comparison of Date Change Methods
The table below summarizes the three main ways to change the date in Windows 11, including their pros and cons.
| Method | Interface | Pros | Cons |
|---|---|---|---|
| Settings App | Graphical | Simple, modern, easy to navigate | Requires disabling automatic sync |
| Control Panel | Graphical | Familiar to legacy users | Extra steps to disable auto sync |
| Command Prompt | Text | Fast, scriptable | Risk of syntax error, no undo |
List of Steps in the Settings Method
For quick reference, here is a bullet-point list of the steps to change the date using the Settings app:
- Open Settings by pressing Windows + I.
- Navigate to Time & language, then Date & time.
- Turn off the Set time automatically toggle.
- Click the Change button under Set the date and time manually.
- Select the desired day, month, and year from the dropdown menus.
- Click Change to save the new date.
These six steps are all you need to manually adjust the system date. After completing them, the date will be updated immediately. If you ever want to revert, simply turn automatic time back on.
Tips for Maintaining Correct Date and Time
To avoid the need for frequent manual adjustments, ensure that your computer is connected to the internet regularly. Windows 11 syncs with time.windows.com by default. If you live in a region with frequent daylight saving time changes, enable the option Adjust for daylight saving time automatically in the Date & time settings. You can also select a different time server if you experience synchronization issues. To do this, click Additional settings in the Date & time screen, then go to the Internet Time tab and click Change settings. Here you can enter a server like time.nist.gov.

For users who travel across time zones, consider turning on the Set time zone automatically feature. This uses location services to detect your current region. Keep in mind that location services must be enabled for this to work. If you prefer to keep location off, you can manually select the correct time zone from the dropdown in Date & time settings.
When to Seek Further Help
If you have followed all the steps and the date still does not change or resets immediately, there may be deeper system issues. Check if your user account has administrative privileges, as manual date changes require admin rights. On some devices, especially those managed by an organization, Group Policy may lock date settings. In such cases, you will see a message indicating that some settings are managed by your organization. Additionally, malware or system file corruption can interfere with the clock. Running a full antivirus scan and using the System File Checker tool may resolve these problems.
If none of the above works, consult the official Microsoft support documentation or community forums for more tailored assistance.
References
This article was compiled using information from the following authoritative sources:
Microsoft Support. "Set time, date, and time zone settings in Windows." https://support.microsoft.com/pt-br/windows/definir-defini%C3%A7%C3%B5es-de-hora-data-e-fuso-hor%C3%A1rio-no-windows-dfaa7122-479f-5b98-2a7b-fa0b6e01b261
HP Support. "Como alterar a data e a hora no Windows 11" (Video). https://www.youtube.com/watch?v=AXQjGFwCeOk
Additional context and verification were obtained from Acer Community and Microsoft Learn Q&A as referenced in the factual notes.