Introduction to Multitasking Settings and Productivity
Multitasking settings are often overlooked by users who want to get more done in less time. The ability to switch between applications, snap windows to specific areas of the screen, and manage virtual desktops can transform how you work. Modern operating systems from Windows to macOS, Android to Chromebooks, offer built-in tools that let you control exactly how your device handles multiple tasks. Understanding these configurations is not about doing more things at once in a chaotic way. It is about creating a structured environment where your attention flows smoothly from one task to the next. This guide walks through the key multitasking settings available on the most common platforms and explains how adjusting them can lead to better productivity.
Many people assume multitasking means having many windows open at the same time. But true multitasking efficiency comes from knowing how to organize those windows, how to switch between them quickly, and how to reduce visual clutter. Each operating system provides a set of controls that allow you to fine-tune this experience. Some settings are easy to find, while others are hidden in menus you might never explore. The goal of this article is to show you exactly where those settings are, what they do, and how to use them to your advantage.
Multitasking Settings on Windows 10 and 11: Snap Layouts and Virtual Desktops
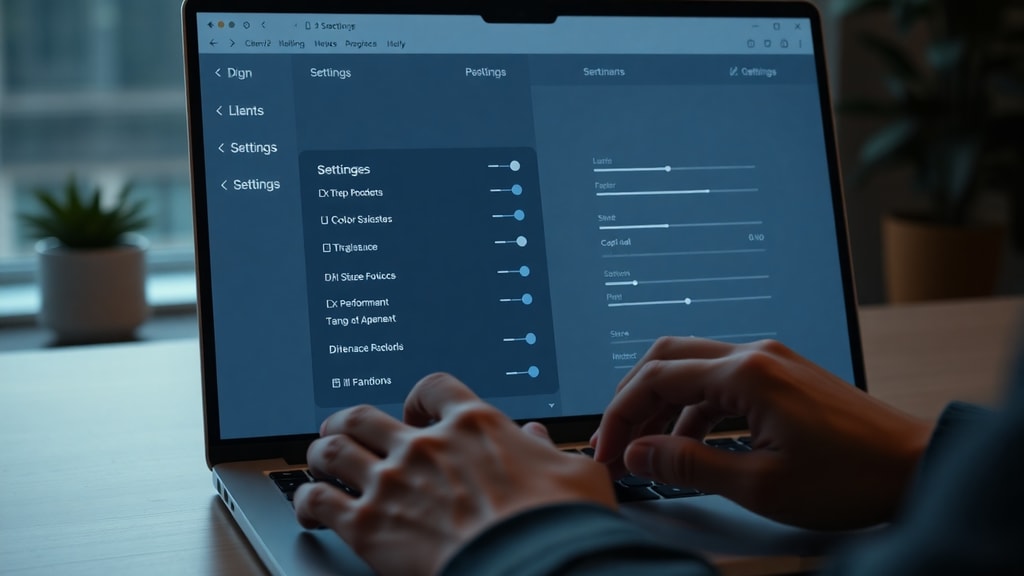
Windows 10 and Windows 11 offer some of the most flexible multitasking settings available on desktop computers. The Snap feature, which lets you drag a window to the edge of the screen to resize it automatically, has been a staple for years. In Windows 11, this evolved into Snap Layouts, a menu that appears when you hover over the maximize button of any window. You can choose from several preset arrangements, such as two windows side by side, three windows in a column, or a larger main window with smaller ones stacked on the side. These layouts are fully customizable through the multitasking settings menu.
To access these settings, open the Start Menu, click the gear icon to open Settings, then navigate to System and select Multitasking. Here you will find toggles for Snap windows, including options to automatically resize windows when they are snapped, to show Snap Layouts when hovering over the maximize button, and to display snap assist suggestions when you snap one window. You can also control how Alt+Tab behaves, choosing whether it shows only the most recently used windows or all open windows and tabs from Microsoft Edge. Another important setting is the virtual desktop behavior, which lets you decide whether Alt+Tab switches between all desktops or only the current one. For users who rely on multiple monitors, Windows also offers settings for how taskbar buttons are displayed across screens. For a deeper look at how to divide your screen effectively on Windows, you can refer to this guide on dividing the screen on PC.
How to Access and Customize Multitasking on Windows
The path to multitasking settings in Windows is consistent across versions. From the Start Menu, click Settings, then System, then Multitasking. The options are grouped logically. Below is a list of the main categories you can adjust.
- Snap windows: Enable or disable the entire snap feature, and choose whether windows automatically resize when snapped to edges or corners.
- Snap Layouts: Control whether the layout menu appears when you hover over the maximize button.
- Snap Assist: Decide if Windows shows suggestions for filling empty screen space after snapping a window.
- Title bar window shake: Enable or disable the Aero Shake feature that minimizes all other windows when you shake the title bar of one window.
- Alt+Tab: Choose what appears when you press Alt+Tab, from open windows only to all tabs in Microsoft Edge.
- Virtual desktops: Configure how Alt+Tab and the task switcher behave across multiple desktops.
- Taskbar across multiple displays: Control where taskbar buttons appear when using more than one monitor.
Each of these settings has a direct impact on your daily workflow. For example, disabling Snap Assist can speed up the snapping process if you already know exactly where you want windows to go. Enabling title bar window shake can help you quickly clear clutter when you need to focus on a single window. Experimenting with these options for a few days can reveal a setup that feels natural and saves time.
macOS Multitasking: Stage Manager and Spaces
Apple has taken a different approach to multitasking with macOS. Instead of providing a single settings page labeled Multitasking, the operating system distributes its multitasking features across several areas. The most prominent feature is Stage Manager, introduced in macOS Ventura. Stage Manager groups your open windows along the left side of the screen, allowing you to focus on one app at a time while keeping others easily accessible. You can enable Stage Manager from the Control Center or from System Settings under Desktop and Dock. Once active, you can drag windows to the left to add them to the stage, click any app icon to switch to it, and even create groups of apps that work together.
Another key multitasking tool on macOS is Spaces, which are essentially virtual desktops. You can create multiple Spaces and switch between them using Mission Control, accessed by swiping up with three fingers or pressing the F3 key. Within Mission Control, you can drag windows from one Space to another, create new Spaces, and delete ones you no longer need. There is also Split View, which works similarly to Windows Snap. When you hover over the green full-screen button in the top-left corner of a window, you can choose to tile it to the left or right side of the screen, then select another window to fill the remaining space. Unlike Windows, macOS does not have a centralized multitasking settings panel. Instead, you configure these behaviors in System Settings under Desktop and Dock, Mission Control, and Stage Manager. For more details on how macOS handles multitasking, the Apple Education learning center offers a comprehensive overview of these features.
The trade-off with macOS is that you have fewer granular controls compared to Windows. You cannot, for example, disable the animation when switching between workspaces or choose exactly which apps appear in the dock versus the stage. However, the simplicity of the system works well for users who prefer a more curated experience. The key is to understand the gestures and keyboard shortcuts that make these features fast to use. Learning to swipe between Spaces with a trackpad gesture or to activate Stage Manager with a keyboard shortcut can make a noticeable difference in your workflow.
Android Multitasking: Split Screen and Gesture Controls
Android devices, especially phones and tablets from Samsung and other manufacturers, offer powerful multitasking settings that are sometimes hidden behind developer options. On most modern Android versions, split-screen mode is the primary way to run two apps side by side. You can activate it by opening the recent apps overview, tapping the app icon at the top of a card, and selecting Split screen. Then choose a second app from the list. On Samsung devices running One UI, there is an additional option called Pop-up view, which lets you float an app in a resizable window over other apps. This is useful for watching a video while reading email or for keeping a calculator open while filling out a form.
Some advanced multitasking features on Android require enabling the System UI Tuner or a similar hidden menu. On stock Android, you can access the System UI Tuner by pulling down the notification shade twice, long-pressing the gear icon for a few seconds, and then releasing. This adds a System UI Tuner entry in Settings. Inside, you may find options for controlling the split-screen gesture. On Samsung devices, the path is different. You need to go to Settings, then Advanced Features, then Labs, and enable the Multi window swipe-up gesture. This allows you to swipe up from the bottom corner of the screen with two fingers to enter split-screen mode directly. Without these settings activated, the split-screen feature may not work as intuitively. The Tecmundo article on activating the multitask function on Android explains exactly how to find these hidden options.
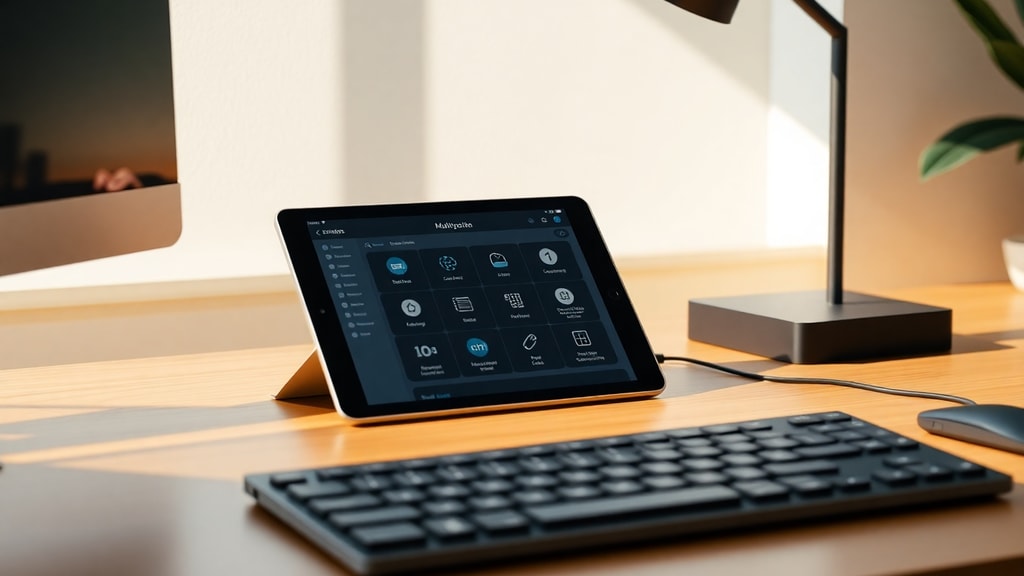
Tablets running Android benefit even more from these settings. Devices from Samsung like the Galaxy Tab series allow up to three apps on screen at once, plus floating windows. The multitasking settings on these tablets include options for customizing the taskbar, adjusting how apps behave in split-screen mode, and setting default layouts for specific app pairs. Taking the time to explore these settings can turn a tablet into a genuine productivity tool rather than just a media consumption device.
Chromebook Multitasking: Floating Windows and Tab Management
Chromebooks have evolved significantly in their multitasking capabilities. The ChromeOS interface now supports floating windows, which you can create by dragging a window away from the edge of the screen or by pressing the Alt key while clicking the maximize button. Once a window is floating, you can resize it freely and position it anywhere on the screen. This is especially useful when you want to keep a small window visible while working in a full-screen app. Chromebooks also support virtual desks, which are similar to workspaces on other operating systems. You can create multiple desks, name them, and move windows between them. This helps separate different projects or contexts, such as work, personal browsing, and entertainment.
The multitasking settings on a Chromebook are found in the Settings app under Device and then Displays. Here you can adjust how windows behave, whether they snap to grid positions, and how the shelf displays open apps. The Alt+Tab switcher on a Chromebook shows thumbnails of all open windows, and you can cycle through them with repeated presses. There is also a dedicated overview key, usually the square icon above the number 6 key, that shows all open windows at once. From the overview screen, you can drag windows to different desks, close apps, or click to switch. Google has also introduced a feature called Partial screenshot with the Screen capture tool, which works alongside multitasking by letting you capture a specific area of the screen without switching contexts. Exploring these settings can make the Chromebook experience much more fluid for users who juggle many tasks at once.
Comparison of Multitasking Features Across Platforms
To help you understand the differences and similarities between the major platforms, the table below summarizes the key multitasking features available on Windows, macOS, Android, and Chromebooks.
| Feature | Windows 10/11 | macOS | Android | Chromebook |
|---|---|---|---|---|
| Split screen / Snap | Snap Layouts and Snap Assist | Split View via green button | Split screen via recent apps | Snap to grid by dragging |
| Virtual desktops | Task View with multiple desktops | Spaces with Mission Control | Not natively available
Notice
This guide is for general informational purposes only and may vary by device or software version.
|