Understanding the Need for Additional Mouse Buttons
Modern computer mice often come with more than the standard two buttons and a scroll wheel. These additional buttons, sometimes located on the side or near the thumb rest, can significantly improve your workflow and gaming performance. Configuring these buttons allows you to assign specific commands, shortcuts, or macros to them, reducing the need to reach for the keyboard. Whether you are a graphic designer, a video editor, or a gamer, learning how to configure additional mouse buttons can save you time and make your computer usage more efficient. The process varies depending on your operating system and the brand of your mouse, but there are several reliable methods to achieve full customization.
Using Manufacturer Software for Customization
The most straightforward and recommended method for configuring additional mouse buttons is to use the software provided by the mouse manufacturer. Brands like Logitech, Corsair, Razer, and SteelSeries offer dedicated applications that give you complete control over every button on your mouse. These programs are designed to work seamlessly with their hardware and often include features like profile management, macro recording, and lighting control. For example, Logitech G Hub allows you to assign keystrokes, media controls, or complex macros to any button. Similarly, Corsair iCUE provides a comprehensive interface for button mapping and performance tuning. To get started, download the appropriate software from the manufacturer's official website, install it, and connect your mouse. Once the software recognizes your device, you can navigate to the button assignment section and choose the action you want for each button. This method is ideal because it ensures compatibility and often includes firmware updates that improve functionality.

Third-Party Solutions for Generic Mice
If your mouse does not have official software support, or if you prefer a lightweight alternative, third-party applications like X-Mouse Button Control are excellent options. This free utility works on Windows from XP to Windows 11 and allows you to remap any mouse button, including the scroll wheel clicks and tilt actions. The interface is simple: after installation, you will see a list of layers, each representing a different profile. You can select a button from the visual representation of your mouse and then choose an action from a dropdown menu. Actions include simulating keystrokes, launching applications, executing clipboard commands, or even controlling media playback. One of the strengths of X-Mouse Button Control is its ability to create application-specific profiles. For instance, you can set your side buttons to copy and paste in a text editor, while in a web browser they can navigate forward and backward. After making your selections, click Apply to save the changes. This tool is particularly useful for users who own multiple mice or who want a consistent experience across different devices.
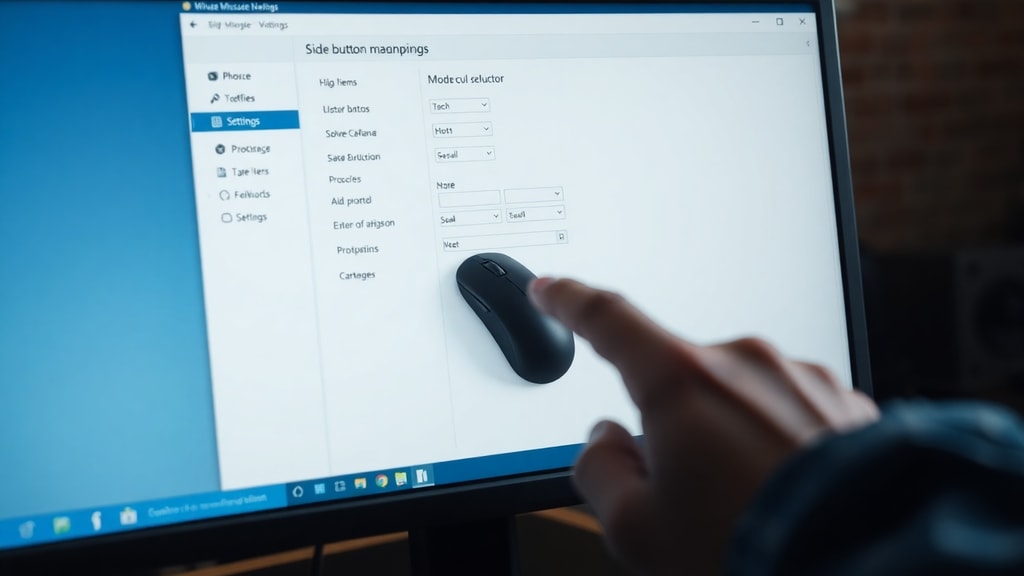
Built-in Windows Settings and Limitations
Windows 10 and Windows 11 offer basic mouse configuration options, but they are limited to primary button functions. You can access these settings by pressing the Windows key and I to open Settings, then navigating to Devices, Mouse, and finally Additional mouse options. In the Buttons tab, you can switch the primary and secondary buttons, adjust double-click speed, and enable ClickLock. However, these settings do not allow you to assign custom actions to additional buttons like side buttons or thumb buttons. For users who only need to swap left and right buttons or adjust sensitivity, the built-in Windows tools are sufficient. But for full customization of extra buttons, you will need to rely on manufacturer software or third-party applications. It is important to note that some mice with generic drivers may not even be recognized by Windows for button remapping, making external software essential.
Step-by-Step Guide Using X-Mouse Button Control
To help you get started with a practical example, here is a step-by-step guide using X-Mouse Button Control, which is one of the most popular third-party tools. First, download the software from the official website and install it. Once installed, launch the application. You will see a window with a visual representation of a mouse and a list of layers on the left. Each layer can hold a different configuration, which is useful for switching between tasks. Click on the button you want to configure, such as Button 4 or Button 5. A dropdown menu will appear with a wide range of actions. For common tasks, you can select Simulated Keys and then type the keystroke you want, such as Ctrl+C for copy. Alternatively, you can choose Media Controls to adjust volume or skip tracks. After selecting the action, click Apply to activate the change. You can also create application-specific profiles by clicking on the Profiles menu and adding a new profile for a specific program. This way, your mouse buttons will behave differently in different applications. The software is lightweight and runs in the system tray, so it does not consume significant resources.
Common Actions and Their Benefits
When configuring additional mouse buttons, you can assign a variety of actions to improve your productivity. Below is a table showing common actions and their typical use cases.

| Action | Use Case |
|---|---|
| Copy (Ctrl+C) | Quickly duplicate text or files without using the keyboard. |
| Paste (Ctrl+V) | Insert copied content with a single click. |
| Undo (Ctrl+Z) | Revert mistakes in documents or image editors. |
| Forward/Back | Navigate web pages or file explorer history. |
| Volume Up/Down | Adjust audio without leaving the current window. |
| Launch Application | Open a frequently used program like a calculator or browser. |
| Macro | Execute a sequence of keystrokes for gaming or repetitive tasks. |
Assigning these actions can reduce hand movement and increase efficiency. For example, using a side button for copy and paste can speed up editing tasks significantly. Gamers often assign abilities or weapon switches to extra buttons for faster reaction times. The key is to choose actions that align with your daily computer use.
Creating Macros for Advanced Users
Macros are sequences of keystrokes or mouse actions that can be triggered by a single button press. Both manufacturer software and X-Mouse Button Control support macro creation. In Logitech G Hub, you can record a macro by clicking the Macro button, then pressing the keys you want to include. You can set delays between keystrokes and choose whether the macro plays once or loops. In X-Mouse Button Control, you can simulate multiple keystrokes by entering them in the Simulated Keys field, using curly braces for special keys like {ENTER} or {TAB}. For example, a macro that types your email address can be created by entering your email as a string of keystrokes. Macros are powerful for automating repetitive tasks, such as filling out forms, executing complex commands in software, or performing combos in games. However, be cautious when using macros in online games, as some games consider them cheating. Always check the game's policy before using macros.

Tips for Choosing the Right Configuration
When deciding how to configure your additional mouse buttons, consider your primary activities. Here is a list of tips to help you make the best choices.
- Start with the most frequent actions you perform, such as copy, paste, or undo.
- Use application-specific profiles to avoid conflicts between different programs.
- Test each assignment for a few days to see if it feels natural and improves your workflow.
- Avoid assigning too many complex macros at once, as it can be confusing to remember them.
- Keep a backup of your configuration files, especially if you use multiple computers.
- For gaming, assign actions that require quick reflexes, like reload or jump, to easily reachable buttons.
By following these tips, you can create a setup that feels intuitive and enhances your productivity. Remember that the goal is to reduce hand movement and make your computer interaction smoother.

Troubleshooting Common Issues
Sometimes, configuring additional mouse buttons does not work as expected. One common issue is that the software does not recognize the mouse. This can happen if the drivers are outdated or if the mouse is connected via a faulty USB port. Try updating the driver through Device Manager or reinstalling the manufacturer software. Another issue is that the assigned action does not work in certain applications. This is often due to application-specific settings or security restrictions. For example, some games block third-party input software. In such cases, you may need to run the configuration software as an administrator or use the manufacturer's native software instead. If the button itself is not responding, check the mouse settings in Windows to ensure the button is not disabled. Finally, if you are using X-Mouse Button Control and the changes do not persist after a reboot, make sure the software is set to start with Windows. You can enable this option in the software's settings under the Startup tab.
References
For further reading and official documentation, you can consult the following sources. The Corsair iCUE guide provides detailed instructions for button assignment on Corsair devices. You can access it at help.corsair.com. Microsoft Support also offers general guidance on mouse settings, which you can find at support.microsoft.com. These resources provide reliable information for both beginners and advanced users looking to optimize their mouse configuration.