Understanding Why Printhead Cleaning Matters
Printhead cleaning, or limpar cabeca de impressao in Portuguese, is a maintenance task that every printer owner will face eventually. The printhead is the component that transfers ink onto paper through tiny nozzles. When these nozzles become clogged with dried ink, dust, or debris, print quality suffers. You might see horizontal white lines, faded colors, or missing sections in your prints. Over time, neglecting this issue can lead to permanent damage, requiring expensive repairs or a replacement printer. Understanding how to clean a printhead easily and safely will save you money and extend the life of your equipment. This guide covers both software-based and manual methods, using everyday materials, to restore your printer to peak performance.
Common Causes of Printhead Clogs
Printhead clogs occur for several reasons. Infrequent use is the most common culprit. When a printer sits idle for weeks or months, the ink inside the nozzles evaporates, leaving behind a sticky residue. This residue hardens and blocks the flow of fresh ink. Environmental factors also play a role. Low humidity, high temperatures, and exposure to dust accelerate ink drying. Using incompatible or third-party ink cartridges can introduce impurities that clog the nozzles faster than genuine cartridges. Additionally, turning off the printer improperly, such as unplugging it while it is still running, can prevent the printhead from parking correctly, leaving it exposed to air and debris.
Diagnosing the Problem Before Cleaning
Before attempting any cleaning, you must confirm that the nozzles are actually clogged. Every printer has a built-in nozzle check function. Access it through the printer's control panel or the software on your computer. This utility prints a test pattern with colored blocks and lines. If the pattern shows gaps, streaks, or missing colors, then clogged nozzles are likely the issue. Running a nozzle check first prevents unnecessary wear on the printhead from excessive cleaning cycles. Many printers also offer a printhead alignment utility, but alignment fixes crooked prints, not missing lines. Always diagnose first, as recommended by Epson in their official support documentation on verifying and cleaning the printhead.
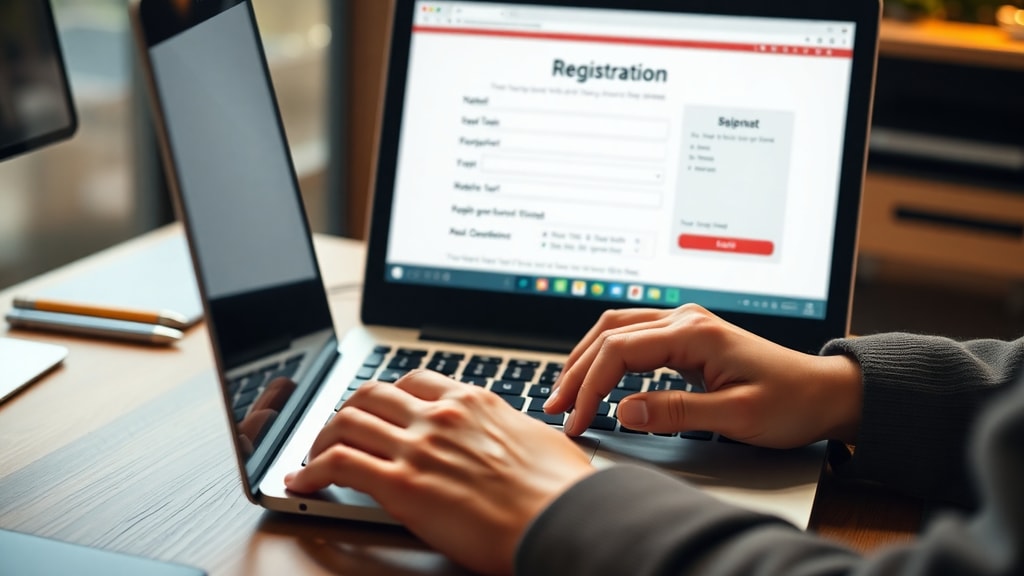
Software Cleaning Method: The Safest First Step
The safest and most convenient cleaning method uses the printer driver software. This process flushes ink through the nozzles under controlled pressure, loosening mild clogs without any physical contact. Here is how to perform a software cleaning on both Windows and Mac systems.
On Windows, open the Control Panel, select Devices and Printers, then right-click your printer and choose Printing Preferences. Look for a tab labeled Maintenance, Tools, or Utility. Inside, you will find an option named Head Cleaning, Clean Printhead, or similar. In some drivers, it appears as Verif. injec. cab. impr. for verification and Limpeza for cleaning. Click Start and wait for the cycle to finish, which usually takes one to three minutes. On Mac, open System Preferences, choose Printers and Scanners, select your printer, and click Options and Supplies. Then go to Utility and open the Printer Utility. There you will find the same cleaning option. After the cycle, print another nozzle check to see if the improvement succeeded.
Follow these steps for best results with software cleaning:
- Always run a nozzle check before cleaning to confirm a clog exists.
- Use the standard cleaning cycle first. Avoid deep cleaning unless necessary, as it uses more ink.
- Wait at least 15 minutes after cleaning before printing again to allow ink to settle.
- Repeat the cycle up to three times. If the nozzle check does not improve, move to manual methods.
- Do not run more than three consecutive cleaning cycles. Over-cleaning can damage the printhead and waste ink.
This method works for most minor clogs. It is gentle on the printer and requires no tools. If you still see problems after three cycles, the clog is likely more severe and requires physical intervention.
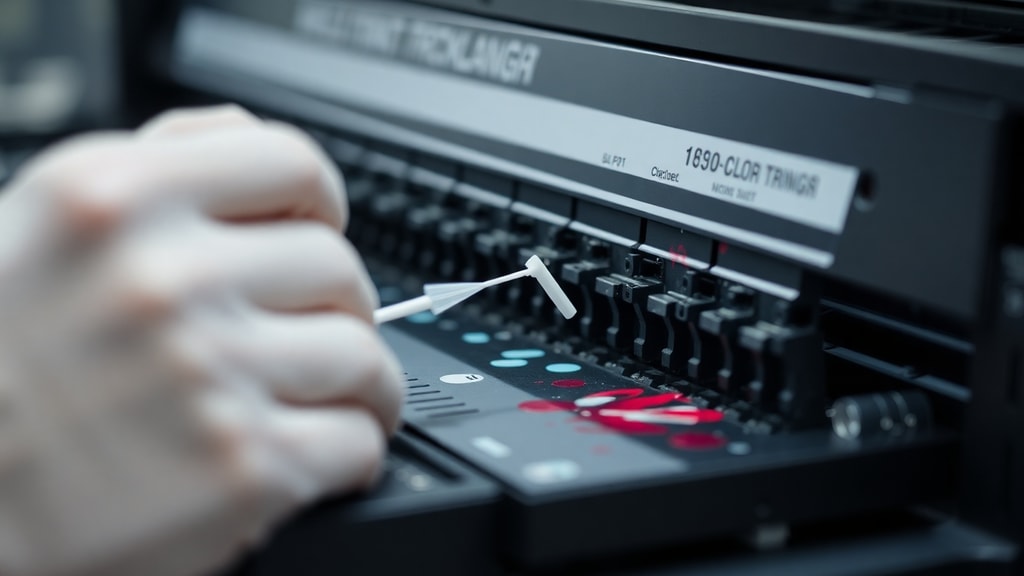
Manual Cleaning Method: When Software Fails
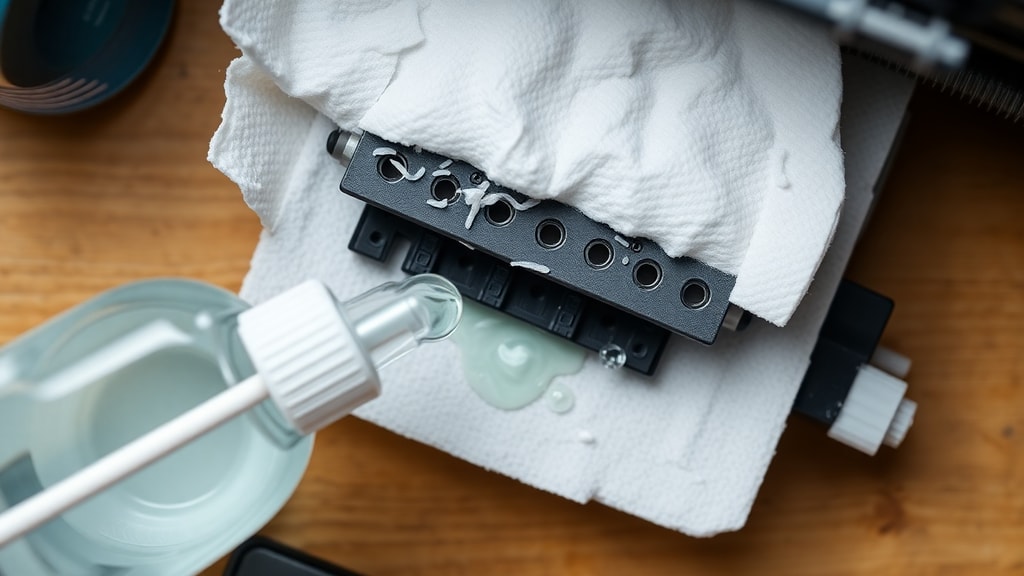
If software cleaning cannot resolve the clog, you must clean the printhead manually. This involves removing the printhead or accessing it while it is still in the printer. Manual cleaning carries some risk of damaging delicate components, so proceed with caution. Use only isopropyl alcohol or warm water. Avoid using tap water, as minerals can leave deposits. Also avoid abrasive materials like paper towels or cloths that shed fibers. Lint-free swabs or microfiber cloths are ideal.
The following table compares the two main agents used for manual cleaning. Choose the one that best suits your situation.
| Cleaning Agent | Best For | Drying Time | Risk Level |
|---|---|---|---|
| Isopropyl alcohol | Dried, stubborn ink residue | Fast (minutes) | Low if used sparingly |
| Warm distilled water | Fresh or soft clogs, sensitive printheads | Slow (up to an hour) | Very low |
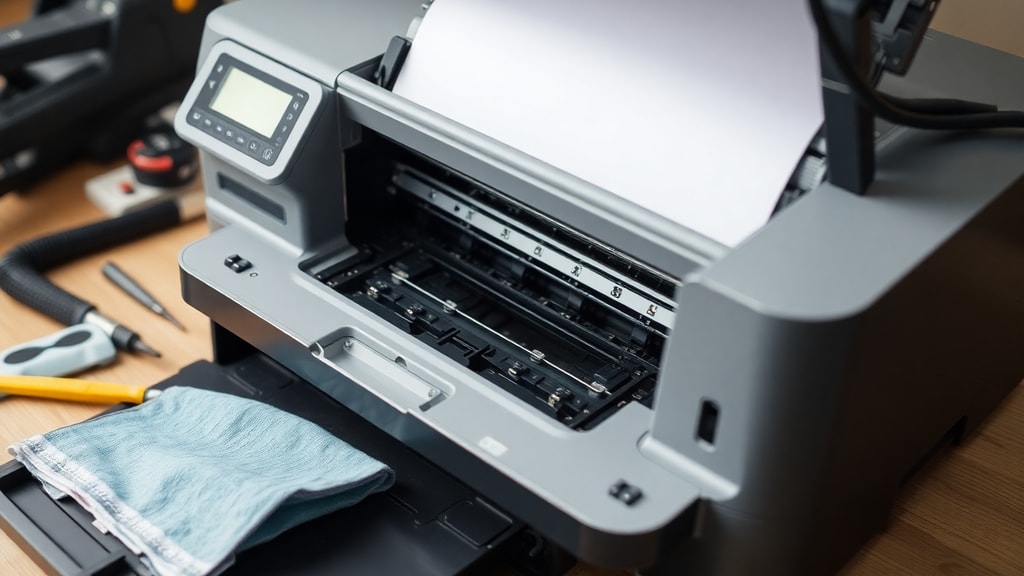
To clean manually, first turn off and unplug the printer. Remove the ink cartridges and locate the printhead. On most inkjet printers, the printhead is a metal or plastic block that moves along a rail. Gently lower it to a stable position. Dampen a lint-free swab with isopropyl alcohol or warm water, then wipe the flat bottom of the printhead where the nozzles are located. Do not press hard. The goal is to dissolve the dried ink, not to scrape it off. After wiping, let the printhead air dry for several minutes. Reinstall the cartridges, plug in the printer, and run a nozzle check. If the clogs persist, you may need a deeper soak.
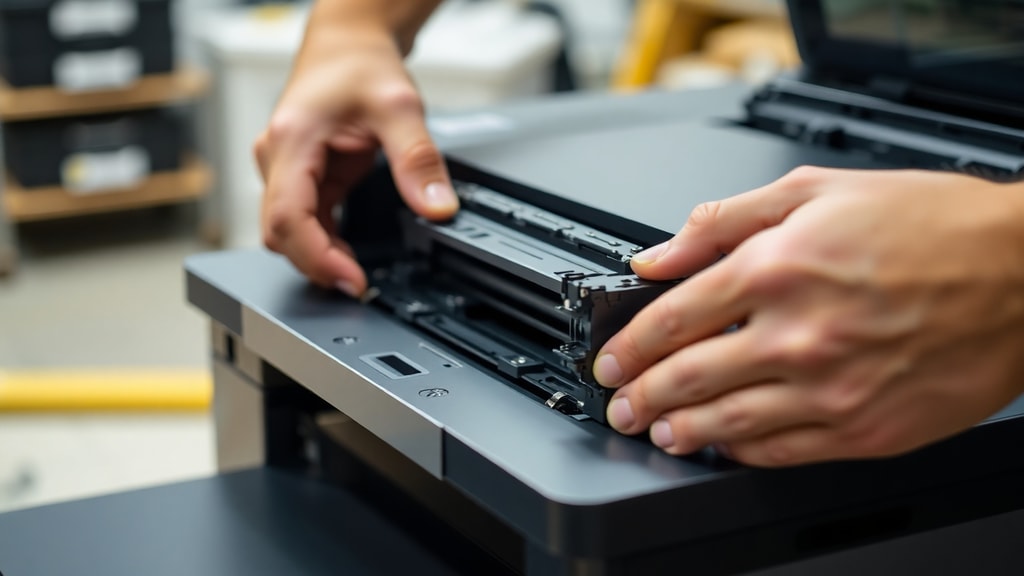
Deep Cleaning for Severe Clogs
For clogs that resist both software cleaning and gentle wiping, a deep soak is the next option. This method requires a specialized printhead cleaning solution, which is available from office supply stores or online. Removing the printhead from the printer is often necessary for a thorough soak. Consult your printer manual for removal instructions, as the process varies by brand and model. Once removed, place the printhead in a shallow dish with a thin layer of cleaning solution. Only the nozzle area should touch the liquid. Do not submerge the electrical contacts. Let it soak for two to twenty-four hours. Longer soaks are more effective for hardened clogs. After soaking, gently blot the nozzles with a lint-free cloth, let the printhead dry completely, then reinstall it. Run a cleaning cycle from the software to flush out any remaining residue.
Sunavin, a manufacturer of printer supplies, recommends this soak method for reviving old or heavily clogged printheads. They advise that patience is key and that you should never force ink through the nozzles with compressed air or sharp objects, as this will destroy the delicate assembly. If the deep soak does not work after two attempts, the printhead may be permanently damaged and require replacement.
For more detailed guidance, you can refer to Brother official cleaning instructions which describe the procedure for their printer models. This source confirms the use of isopropyl alcohol and warm water as safe agents, and emphasizes avoiding contact with the nozzle plate itself to prevent damage.
Cleaning the Printhead Contacts
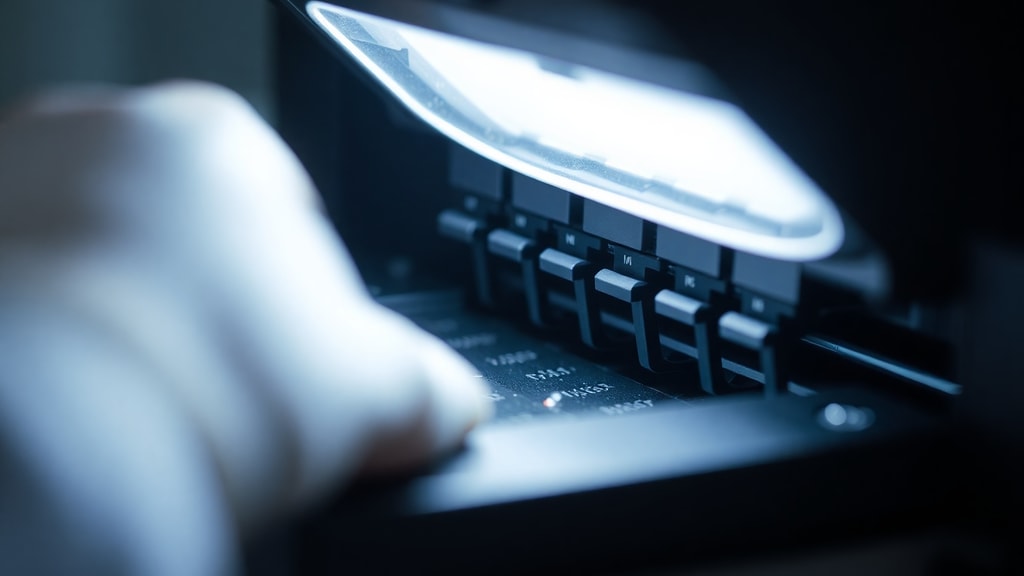
Sometimes the issue is not the nozzles themselves but the electrical contacts between the ink cartridges and the printhead. Dried ink or oxidation on these metal pads can cause communication errors that mimic clogged nozzles. To clean the contacts, remove all ink cartridges. The contacts are small gold or copper squares on the cartridge and the printhead carriage. Dampen a lint-free cloth with isopropyl alcohol and gently wipe each set of contacts. Rotate to a clean section of the cloth for each cartridge to avoid transferring residue. Allow the contacts to dry completely, then reinstall the cartridges. Run a nozzle check to see if print quality improves. This step is often overlooked, but it solves many problems quickly without any ink waste.
Preventing Future Clogs
Prevention is easier than cleaning. The best habit is to print something at least once a week. Even a simple test page keeps ink flowing through the nozzles and prevents drying. When the printer is not in use, always turn it off using the power button. This allows the printhead to park in a sealed position, protecting it from air and dust. Store spare ink cartridges in a cool, dark place, and use them before the expiration date. If you know the printer will be unused for months, consider removing the cartridges and storing them in an airtight container. Another tip is to disable automatic firmware updates, as these can sometimes reset maintenance settings and cause the printer to act unexpectedly. Following these simple habits will drastically reduce the frequency of clogs.
If you are looking for a comprehensive resource on printhead maintenance, Sunavin DIY guide to printhead cleaning offers detailed steps and troubleshooting tips for various printer brands. This guide covers both inkjet and laser printers and is useful for advanced users who want to understand the mechanics behind the cleaning process.
When to Replace the Printhead
There comes a point when cleaning is no longer effective. If you have tried software cleaning, manual wiping, and deep soaking, and the nozzle check still shows missing lines, the printhead may be physically worn out. Other signs include persistent error messages about the printhead, ink smearing on the page, or scratches on the printed surface caused by a damaged printhead scraping the paper. Replacement printheads are available for some printer models, but the cost can be high. Compare the price of a new printhead against the price of a new printer. Often, buying a new printer is more economical, especially for entry-level models. When replacing, choose genuine parts to ensure compatibility and longevity. Rebuilt or third-party printheads may save money upfront but can fail quickly.
References
Epson. Verificar e limpar a cabeça de impressao. Downloaded from https://download4.epson.biz/sec_pubs/xp-65_series/useg/pt/GUID-9234EADD-F457-4FB5-940A-16BB9751EE5B.htm
HP. Como limpar uma cabeca de impressao. Downloaded from https://www.hp.com/br-pt/shop/tech-takes/como-limpar-uma-cabeca-de-impressao-para-melhorar-a-eficiencia-da-tinta
Brother. Como limpar a cabeca de impressao. Downloaded from https://support.brother.com/g/b/faqend.aspx?c=pt&lang=pt&prod=lptj4422tneuk&faqid=faqp00100467_004&pfs=1
Sunavin. Reavivar a sua impressora: Um guia faca-voce-mesmo. Downloaded from https://www.sunavin.com/pt/diy-guide-to-printhead-cleaning/
Lenovo. Como limpar a cabeca da impressora. Downloaded from https://www.lenovo.com/pt/pt/glossary/how-to-clean-a-printer-head